

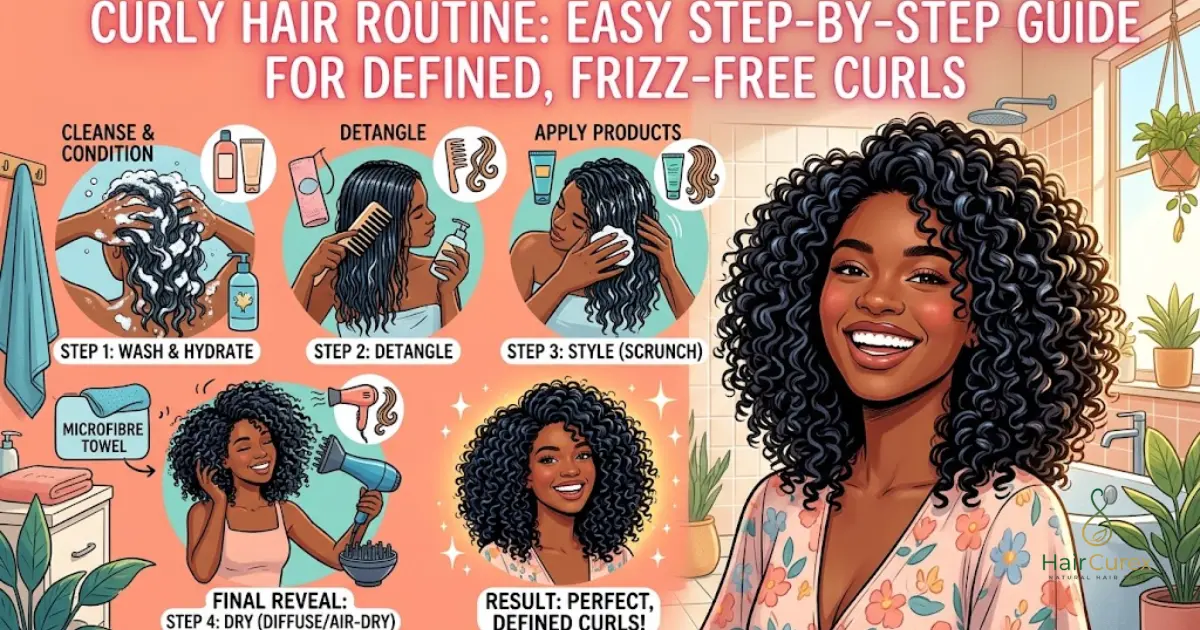
Curly hair looks beautiful when it has enough moisture, definition, and movement. However, curls can also become dry, tangled, frizzy, or difficult to style when your routine doesn’t match your hair’s needs. A consistent curly hair routine helps you understand what your curls need and gives you a repeatable way to wash, condition, style, and refresh them.
This guide breaks down a curly hair routine step by step, from pre-wash detangling to drying and refreshing curls on later days. Whether you’re completely new to curly hair or trying to improve your existing curly hair care routine, you’ll learn how to choose products, adjust your routine for different curl patterns, and avoid common mistakes that can leave curls flat or frizzy.
The goal isn’t to use a shelf full of products. A good natural curly hair routine should be practical enough to follow regularly. Your hair’s porosity, thickness, density, curl pattern, moisture level, and lifestyle all affect what works best. Once you understand those factors, creating an easy curly hair routine becomes much simpler.
Quick Curly Hair Routine at a Glance
A complete routine can look complicated at first, especially when you see different techniques and styling products online. In reality, the basic process follows a simple sequence: cleanse, condition, moisturize, style, define, dry, and finish.
| Step | What You Do | Main Purpose |
|---|---|---|
| 1 | Pre-wash and detangle | Reduce knots and unnecessary pulling |
| 2 | Shampoo the scalp | Remove sweat, oil, and buildup |
| 3 | Condition and detangle | Add moisture and improve slip |
| 4 | Apply leave-in | Keep curls soft and hydrated |
| 5 | Choose a styler | Add moisture, volume, or hold |
| 6 | Define curls | Encourage your natural curl pattern |
| 7 | Scrunch and micro-plop | Remove excess water |
| 8 | Air dry or diffuse | Dry curls without disturbing them |
| 9 | Scrunch out the crunch | Soften the dried styling cast |
This sequence works as the foundation of a curly hair routine for beginners. You don’t have to use every styling product every time. Some people need only leave-in conditioner and gel, while others prefer a curl cream, mousse, or a combination of products.
1. What You Need for a Curly Hair Routine
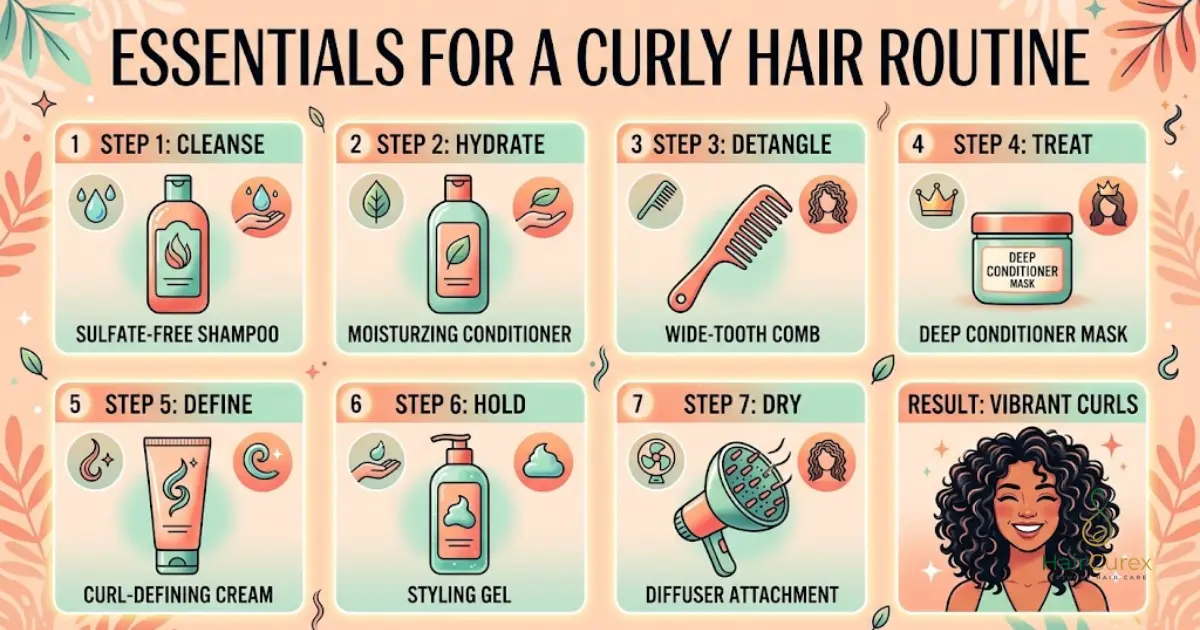
The products you need depend on your curls rather than the number of products recommended on social media. A basic curly hair care routine usually starts with a cleanser and conditioner. Styling products come afterward because their job isn’t to clean your hair. They help shape, moisturize, protect, or hold the curls you’ve already prepared.
A gentle shampoo for curly hair can remove buildup without making your lengths feel excessively stripped. After shampooing, a conditioner for curly hair provides slip and makes detangling easier. If your hair feels dry after washing, a leave-in conditioner for curls can add another layer of lightweight moisture.
Your styling product depends on the result you want. A curl cream can provide softness and moisture. A curl mousse can give lighter hold and volume. A curl gel usually provides stronger definition and helps create a cast that protects the curl shape while the hair dries. You may also need a heat protectant for curly hair if you use a diffuser with heat.
| Product or Tool | Why You May Need It |
|---|---|
| Shampoo | Cleans the scalp and removes buildup |
| Conditioner | Adds slip and moisture |
| Leave-in conditioner | Provides extra moisture and softness |
| Curl cream | Adds softness and curl definition |
| Curl mousse | Adds light hold and volume |
| Curl gel | Creates stronger hold and definition |
| Heat protectant | Helps protect hair during heat styling |
| Microfiber towel | Helps remove water with less rough handling |
| Wide-tooth comb | Helps detangle wet, conditioned curls |
| Diffuser | Helps dry curls while preserving their shape |
How to Choose Curly Hair Products
The best hair styling products for curly hair aren’t necessarily the most expensive ones. Start with your hair’s behavior. If your curls become weighed down easily, heavy creams and multiple layers may make them limp. If your hair feels rough and loses definition quickly, you may benefit from more conditioning and stronger hold.
Think of styling products as tools rather than rules. Your hair might need more moisture during a dry winter and less product during humid weather. You may also need different products for a wash day compared with a quick morning refresh.
2. Step 1: Pre-Wash & Detangle
Detangling before or during washing can make the rest of your routine easier. Tangled curly hair can form because curls naturally wrap around each other. Trying to rip through those knots with a dry brush can create unnecessary pulling and breakage.
If your hair contains stubborn tangles, gently separate larger knots with your fingers first. You can also use a small amount of conditioner or another product that gives your strands slip. Work from the ends toward the roots instead of forcing a comb through the entire length at once.
The goal isn’t to make every strand perfectly straight. You’re simply creating enough separation for cleansing and conditioning. If your curls tangle easily, patience matters more than speed.
3. Step 2: Shampoo Your Scalp Correctly
Your scalp needs regular cleansing because it collects oil, sweat, dead skin cells, styling residue, and environmental debris. Apply your shampoo for curly hair primarily to the scalp rather than aggressively rubbing the lengths.
Use your fingertips to massage the scalp gently. Your fingertips can move through the hair more effectively when you divide the scalp into sections. Let the lather move through the lengths as you rinse rather than repeatedly scrubbing the ends.
A regular shampoo may work for routine washing. A clarifying shampoo can become useful when your hair feels coated, unusually heavy, dull, or difficult to style. However, how often you clarify depends on your products, scalp, washing frequency, and individual hair needs.
The biggest mistake is assuming curly hair should never be shampooed. Your scalp still needs appropriate cleansing. The goal is to find a balance between removing buildup and keeping your curls comfortable.
4. Step 3: Condition & Detangle Curls
After cleansing, apply your conditioner for curly hair through the lengths and ends. Curly hair often benefits from conditioner because its bends can make it harder for natural scalp oils to travel evenly along the strand.
This is also a good time to detangle. When your hair has conditioner in it, your fingers or wide-tooth comb can move through the curls more smoothly. Start at the ends and gradually work upward.
Don’t rush this step. If you constantly fight your hair while conditioning, you may create more pulling than necessary. Instead, separate curls gently and allow the conditioner to provide enough slip before working through stubborn areas.
If your hair feels consistently dry, you can occasionally add a deeper conditioning treatment to your wash routine. However, more moisture isn’t automatically better. Hair that becomes limp, overly soft, or difficult to style may need a different balance.
5. Step 4: Apply Leave-In Conditioner
A leave-in conditioner for curls can help maintain softness after you rinse your regular conditioner. Apply it to wet or very damp hair depending on how your product performs and how much moisture your curls need.
Start with a small amount. You can always add more, while removing too much product usually means washing or thoroughly rewetting the hair.
Distribute the leave-in through your lengths with your fingers or a suitable brush. Pay attention to areas that become dry first, such as the ends.
If your curls look greasy or lose volume after applying leave-in, reduce the amount. Fine curls often need less product than dense, coarse curls. Your goal is hydrated hair that still moves freely.
6. Step 5: Choose Curl Cream, Mousse or Gel
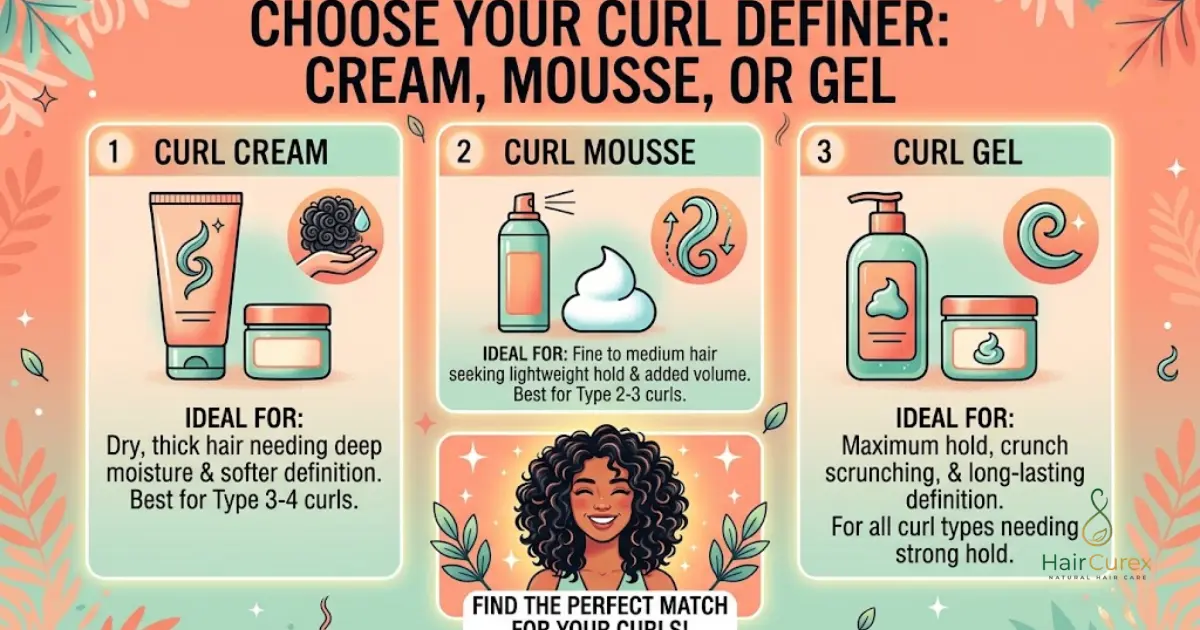
This is where many curly hair routines become unnecessarily complicated. You don’t need to apply every styler simply because someone else uses all three.
A curl cream generally focuses on softness, moisture, and definition. A curl mousse can provide lighter styling with volume. A curl gel usually provides stronger hold and helps curls maintain their shape as they dry.
| Styler | Usually Best For | Main Benefit |
|---|---|---|
| Curl cream | Dry or coarse curls | Softness and moisture |
| Curl mousse | Fine or easily weighed-down curls | Light hold and volume |
| Curl gel | Curls that lose shape or frizz easily | Stronger definition and hold |
You can layer products when your hair needs them. For example, someone with dry, coarse curls may use leave-in followed by curl cream and gel. Someone with fine waves may prefer mousse alone.
How to Apply Gel to Curly Hair
If you’re learning how to apply gel to curly hair, start with wet or very damp curls. Spread a small amount between your hands and distribute it through sections of hair.
The praying hands curly hair technique involves placing a section between your flat palms and gently smoothing downward. This can help distribute gel while encouraging curl clumps.
Then use scrunching curly hair techniques to push the curls upward toward the scalp. Don’t aggressively squeeze the hair. Gentle repeated scrunching usually works better.
When the gel dries, it may create a firm feeling called a cast. That’s normal. Once your hair has completely dried, you can soften that cast by gently scrunching it.
7. Step 6: Define Your Curls
Learning how to define curly hair is less about forcing every strand into the same shape and more about encouraging the pattern already present.
Start with very wet hair if your curls respond well to water. Divide dense hair into manageable sections. Apply your styling product evenly, then use your fingers, palms, or a suitable brush to encourage curl clumps.
Finger coiling curls can help stubborn sections form a clearer spiral. Wrap a small section around your finger in the direction the curl naturally wants to move. Release it gently and allow it to group with neighboring curls.
Don’t finger coil your entire head unless you enjoy the process. It can take a long time. For most people, focusing on the front pieces, crown, or visibly undefined areas gives a good balance between definition and effort.
The same principle applies to how to make curls more defined. Work with your natural pattern rather than trying to manufacture a completely different curl shape.
8. Step 7: Scrunch & Remove Excess Water
After styling, your hair may contain a lot of water. Removing some of it can help shorten drying time while preserving curl clumps.
Use a microfiber towel for curly hair or a soft cotton T-shirt. Avoid rough rubbing because aggressive towel drying can disturb curl groups and increase frizz.
Plopping curly hair involves placing wet curls into a soft fabric and allowing them to sit gently against the head. This can help encourage curl formation and remove some water.
Micro plopping curly hair uses a similar idea but focuses on gently scrunching sections with fabric rather than wrapping the entire head.
Neither technique works identically for everyone. Some curls become beautifully defined after plopping, while others become compressed or lose volume. Treat the technique as an option rather than a requirement.
9. Step 8: Air Dry or Diffuse
There are two common ways to finish a curly hair routine: let your curls dry naturally or use a diffuser for curly hair.
Air drying curly hair requires little equipment. Once your styling products are in place, leave the curls alone while they dry. This can reduce mechanical disturbance, although it may take several hours depending on hair density, climate, and how wet your hair was.
Diffusing curly hair can speed up drying and help create volume when used carefully. Start with a low or moderate airflow and avoid constantly moving the diffuser through the curls. Let the curls settle into the diffuser bowl before moving to another area.
If you use heat, a heat protectant for curly hair can be part of your styling routine. Avoid using excessive heat simply because you want faster drying. The goal is to dry the hair efficiently while limiting unnecessary heat exposure.
| Drying Method | Main Advantage | Possible Drawback |
|---|---|---|
| Air drying | Simple and requires no heat | Can take a long time |
| Diffusing | Faster drying and more volume control | Requires careful heat and airflow management |
10. Step 9: Scrunch Out the Crunch
Once your curls are completely dry, your gel may leave them feeling firm or crunchy. Don’t panic and don’t immediately add more product.
This firm layer can help hold the curl shape while the hair dries. Once everything is fully dry, gently squeeze the curls with clean, dry hands.
This process is often called scrunching out the crunch. Continue until your curls feel softer while maintaining their shape.
Avoid aggressively separating every curl. Too much manipulation can turn defined curls into frizzy hair within minutes.
11. How to Build a Curly Hair Routine for Your Curl Type
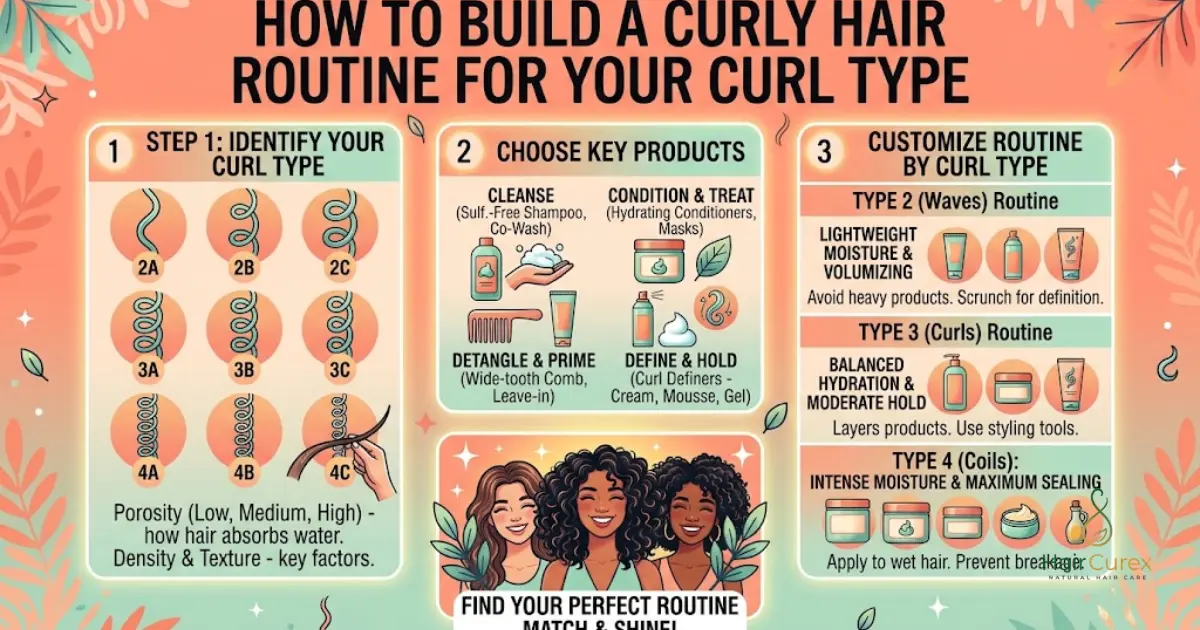
Your curl pattern gives you useful information, but it doesn’t tell the whole story. Two people with 3A curls may need completely different routines because one has fine, low-density hair while the other has thick, coarse hair.
A 2A curly hair routine usually needs lighter styling because loose waves can lose volume quickly. A 2B curly hair routine may benefit from more definition and hold because the wave pattern is stronger. A 2C curly hair routine often needs enough moisture and hold to keep its stronger waves from becoming frizzy.
With tighter patterns, moisture and gentle handling often become increasingly important. A 3A curly hair routine, 3B curly hair routine, or 3C curly hair routine may involve richer conditioning and more deliberate styling, although individual needs still vary.
The best routine starts with your actual hair behavior. Curl charts can guide you, but they shouldn’t become strict rules.
12. Fine vs Thick Curly Hair: What Should Change?
A fine curly hair routine usually works better when you control product weight. Too much leave-in, cream, or oil can flatten the curl pattern and make the roots look oily.
Thick hair often has the opposite challenge. A thick curly hair routine may require more product distribution and sectioning because dense hair can prevent products from reaching every layer evenly.
| Hair Characteristic | Fine Curly Hair | Thick Curly Hair |
|---|---|---|
| Product amount | Usually less | Often more |
| Styling focus | Volume and light definition | Moisture and even distribution |
| Sectioning | Often minimal | Frequently useful |
| Heavy creams | May weigh hair down | May provide useful moisture |
| Drying | Often faster | Often slower |
These aren’t rigid rules. Fine hair can still be dry, and thick hair can still become weighed down. Your hair’s condition matters as much as its thickness.
13. Low-Porosity vs High-Porosity Curly Hair
Porosity describes how easily hair absorbs and holds water. A low porosity curly hair routine often focuses on avoiding excessive product buildup because products may sit on the surface rather than moving easily into the hair.
A high porosity curly hair routine often focuses on moisture retention because the hair can lose water more quickly. Chemical processing, heat, weathering, and physical damage can all affect the condition of the cuticle.
Porosity isn’t a perfect label that determines every product choice. Use it as one clue. Pay attention to how your hair actually behaves after washing, conditioning, and styling.
14. Curly Hair Routine for Frizz, Dryness & Breakage
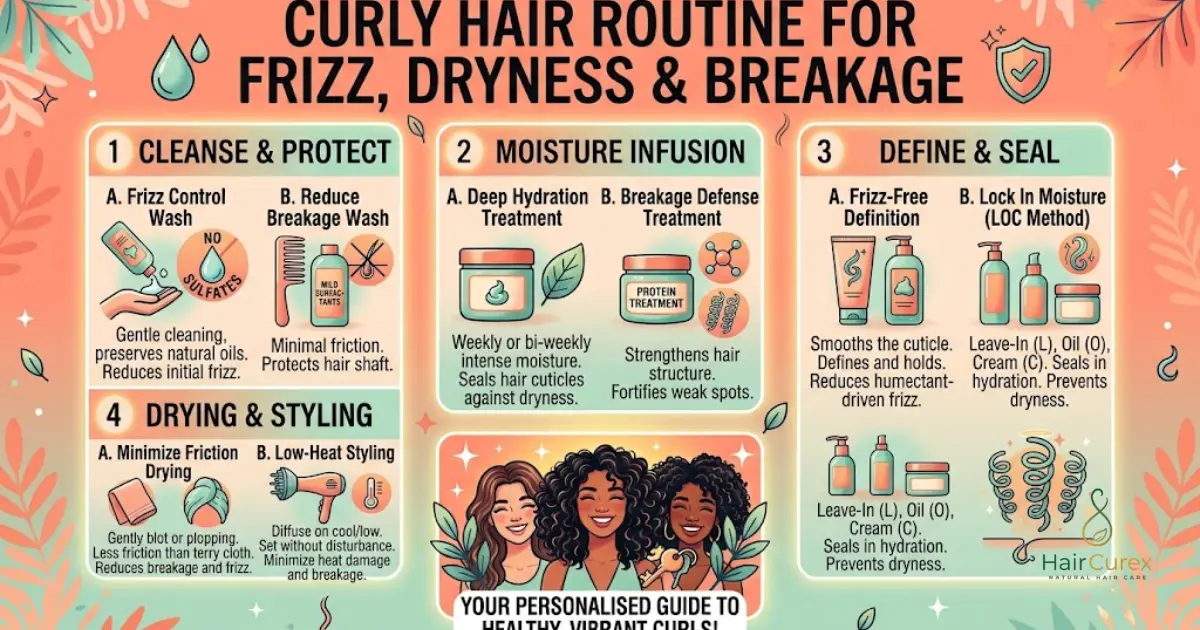
A curly hair routine for frizz should start by identifying where the frizz comes from. Frizz isn’t always a sign that your hair needs more product. It can result from humidity, dryness, damaged strands, excessive manipulation, poor product distribution, or disrupting curls while they’re drying.
If you’re wondering how to reduce frizz in curly hair, focus on gentle handling first. Keep your hands away from curls while they’re drying. Use suitable fabric instead of rough towel rubbing. Apply styling products evenly and avoid repeatedly brushing through dry curls.
A dry curly hair routine may need more conditioning and fewer harsh cleansing practices. However, adding heavier and heavier products isn’t always the solution. If the hair feels coated rather than moisturized, buildup could be part of the problem.
Curly hair breakage also deserves attention. Repeated pulling, aggressive detangling, tight hairstyles, excessive heat, and rough handling can contribute to mechanical damage. A gentle routine protects the hair while still allowing you to style it.
Case Study: When More Product Makes Curls Worse
Imagine someone with fine 2B curls who notices frizz after washing. They add leave-in conditioner, curl cream, mousse, gel, and oil because they assume more moisture will solve the problem.
Instead, the curls become flat and greasy.
The better approach is to simplify. They might keep the conditioner, use a lightweight leave-in, and choose mousse or gel depending on the desired hold. If the curls become more defined after removing unnecessary layers, the problem wasn’t a lack of products. It was product weight.
This illustrates an important principle: a better curly hair routine isn’t necessarily a bigger routine.
15. Curly Hair Refresh Routine for Day 2 and Day 3
Your wash day doesn’t have to start again every morning. A curly hair refresh routine can bring back shape without completely washing your hair.
Start by checking what actually needs fixing. If the curls look good but the front pieces have flattened, refresh only those areas. Lightly mist the hair with water, then gently reshape the curls with your hands.
For more stubborn areas, add a tiny amount of your styling product. Avoid coating the entire head again unless your hair genuinely needs it.
A practical day 2 curly hair routine may take only a few minutes. Your day 3 curly hair routine might require slightly more water and targeted restyling because curls can lose more definition as time passes.
The best how to refresh curls strategy is often the one that uses the least manipulation necessary.
16. Common Curly Hair Routine Mistakes
Many curly hair problems come from small habits rather than one major mistake. Brushing dry curls aggressively can separate curl clumps. Using too much styling product can weigh down fine hair. Touching curls repeatedly while they dry can create frizz.
Another common problem involves changing products constantly. If you switch five things at once, you won’t know which change helped or caused a problem.
Skipping conditioner can make detangling harder for some hair types. Washing too infrequently can allow buildup to accumulate. Washing too frequently can leave some curls feeling dry.
Your routine should be consistent enough that you can observe how your hair responds.
The simplest routine you can follow consistently is often more useful than a complicated routine you abandon after one week.
17. How Often Should You Wash Curly Hair?
There’s no universal number that works for every person. How often to wash curly hair depends on your scalp, hair texture, exercise habits, climate, styling products, and personal preference.
Some people wash every few days. Others go longer between washes. Your scalp is the best place to start when deciding whether it’s time to cleanse.
If your scalp feels oily, sweaty, uncomfortable, or heavily coated, cleansing may be appropriate. If your scalp feels comfortable and your curls still look and feel good, you may not need to wash immediately.
A curly hair wash day routine should therefore be flexible. You can adjust cleansing frequency while keeping the basic conditioning and styling sequence consistent.
18. Simple Curly Hair Routine for Beginners
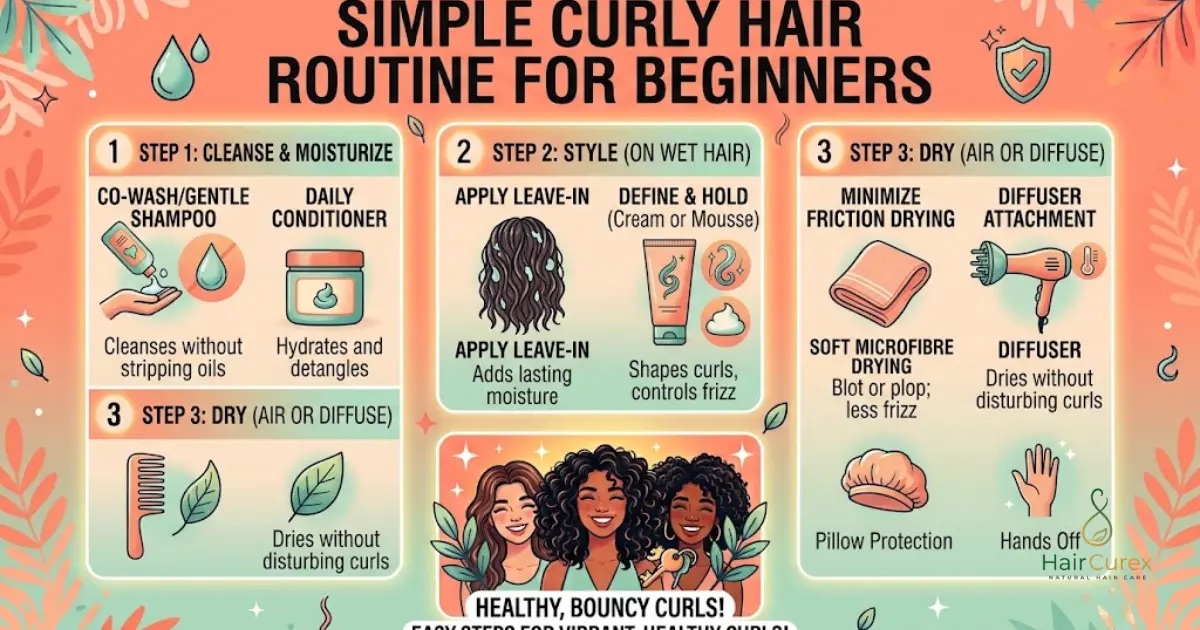
If you’re completely new to curls, don’t start with ten products and six styling techniques. Start with a manageable curly hair routine for beginners and learn how your hair responds.
Your basic routine can follow this sequence:
Cleanse → Condition → Leave-In → Style → Scrunch → Dry → Finish
On wash day, cleanse your scalp, condition your lengths, detangle gently, apply leave-in if needed, then use one main styling product. Define the curls, remove excess water, and let them air dry or diffuse.
Once you’ve learned what your curls like, you can experiment with techniques such as finger coiling, praying hands, plopping, or micro plopping.
A simple routine also makes troubleshooting easier. If something doesn’t work, you’ll know which step to adjust.
19. FAQ
What is the best curly hair routine for beginners?
The best beginner routine is one you can repeat consistently. Start with cleansing, conditioning, gentle detangling, leave-in if needed, one styling product, curl definition, and careful drying.
What order should curly hair products go in?
A common order is shampoo, conditioner, leave-in conditioner, curl cream or mousse, and gel. You don’t need every product. Adjust the order and amount according to how your hair responds.
How often should I wash curly hair?
Wash according to your scalp and hair needs rather than following a fixed schedule. Oil, sweat, buildup, climate, and styling habits can all affect your ideal washing frequency.
Should you brush curly hair?
Detangle curly hair gently when it’s wet and conditioned if that works well for your texture. Brushing dry curls can disrupt their natural clumps and increase frizz.
Should I style curly hair soaking wet?
Many curls respond well to styling while very wet because water helps products spread and encourages curl clumping. However, some hair types prefer slightly damp hair. Experiment to see which produces better definition.
How can I reduce frizz in curly hair?
Gentle handling is a good starting point. Avoid rough towel drying, limit unnecessary touching while curls dry, distribute styling products evenly, and protect your curls while sleeping.
Can I use gel every wash day?
Yes, if your hair responds well to it. Gel can provide hold and help curls maintain definition. The right amount depends on your hair thickness, desired finish, and the strength of the product.
How do I sleep with curly hair?
Your curly hair night routine can include gently gathering curls above your head or using another low-friction method that suits your hair. A suitable pillowcase or hair covering may also help reduce friction.
What should a curly hair morning routine look like?
A curly hair morning routine should focus on refreshing rather than completely restyling. Mist flattened areas with water, reshape curls gently, and add a small amount of styling product only where needed.
Why are my curls undefined after styling?
Several factors can cause undefined curls, including insufficient hold, uneven product distribution, excess product weight, buildup, excessive manipulation, or styling on hair that doesn’t have enough water.
20. Conclusion
A successful curly hair routine doesn’t need to be complicated. The foundation is simple: cleanse the scalp, condition the curls, detangle gently, add the moisture and hold your hair needs, define the curl pattern, then dry without excessive disturbance.
Your ideal routine may look different from someone else’s. A fine curly hair routine won’t always work for thick curls. A low porosity curly hair routine may need different product choices than a high porosity routine. Even two people with the same curl pattern can have completely different needs.
Start simple and pay attention to your hair. If curls feel dry, adjust moisture. If they’re flat, reduce heavy products. If they’re frizzy, examine how you handle them while wet and dry. If they lose their shape quickly, consider whether you need more hold.
The real goal isn’t to create perfect curls every single day. It’s to build a natural curly hair routine that keeps your hair manageable, healthy-looking, comfortable, and easy to style. Once you understand what your curls respond to, wash day becomes less of a guessing game and more of a routine you can trust.