


Quick answer: Learning how to trim curly hair at home starts with one rule: cut it dry — two or three days after washing, when your curls have settled into their natural pattern. Work curl by curl with sharp hair shears, holding each curl at its natural curve with no pulling, and snip only a quarter to half an inch from the very tip. Never stretch a curl straight to cut it: curls spring up as they dry, so a small snip on a stretched curl becomes a much bigger loss of length once it bounces back. A careful maintenance trim takes 45 to 90 minutes.
It is not a full reshape — if your shape is uneven, your layers are wrong, or you want a new style, book a curl specialist instead.
Curly hair punishes the straight-hair method of cutting. Cut it wet and straight across, and two things go wrong at once: the curls shrink up as they dry, taking far more length than you intended, and the straight edge turns into a triangle, wide at the bottom and flat on top. That is why so many home trims end in regret, and why the advice in this guide is almost the opposite of what you would do with straight hair.
The good news is that a maintenance trim — tidying the ends, removing split ends, keeping the shape you already have — is genuinely doable at home once you drop the straight-hair method entirely. This guide covers when to trim, what you need, the step-by-step curl-by-curl method, the mistakes that ruin a trim, and how to know when the job belongs to a professional.
Why Trimming Curly Hair at Home Is Different
The difference comes down to shrinkage. A curl is a spring. When it is wet and heavy, it hangs long; when it dries, it coils up and shortens. Depending on your curl type, that shrinkage can be roughly 20 to 50 percent of the wet length — a loose wave may lose only a couple of centimetres, while a tight coil can spring up several inches. Those are ranges, not exact figures for any one head of hair, and your own shrinkage is the single most important thing to learn before you pick up the shears. It is also why every reliable curly-hair guide agrees on the first rule: cut curly hair dry, in the shape you actually wear it.
The second difference is that curls do not fall in a straight line. Each curl is its own unit with its own length, spring, and direction, so a straight-across cut lands at a different place on every curl. Cutting curl by curl respects that — you trim each curl where it naturally sits, so the finished shape follows your curl pattern instead of fighting it.
The third difference is that curly hair shows damage differently. Split ends on curly hair do not just look frayed; they break the curl pattern, so a single damaged curl unravels into frizz while its neighbours stay defined. That is why a small trim can make such a visible difference, and why leaving split ends alone costs you definition, not just length. Our companion guide to split ends explains what split ends are, how to spot them, and why they travel further up the strand if you ignore them.
What You Need Before You Start

Do not start without the right tools. The wrong scissors are the single most common cause of a bad home trim, and they are also the easiest mistake to avoid. Gather everything before your first snip, and lay it out where you can reach it without putting the shears down mid-section.
Sharp hair-cutting shears. This is the one tool you cannot substitute. Professional shears have a convex edge that slices the hair cleanly; household scissors, kitchen scissors, and dull blades crush and tear the cuticle, which creates frizz and new split ends almost immediately. Look for shears in the 5.5 to 6.5 inch range. They do not need to be expensive — a basic pair of proper hair shears is enough for a maintenance trim — but they do need to be sharp and reserved for hair only. Never cut paper or fabric with them.
Sectioning clips. Four to six sturdy clips to hold sections out of the way while you work. Duckbill clips or alligator clips both work; avoid clips with teeth that snag curls.
A wide-tooth comb. For detangling gently before you start, and for separating curl clumps without breaking the pattern. Do not use a fine-tooth comb on dry curls — it pulls the pattern apart and creates frizz.
Two mirrors. A large mirror in front and a hand mirror behind, so you can check the back without turning your head and disturbing the curls. A second angled mirror is worth setting up before you begin, not halfway through.
Good light and a clean, dry workspace. Trim in daylight or under bright white light. Dim light hides split ends and uneven lengths. Put a towel or an old sheet over your shoulders and the floor so you can see what falls — and so you can clean up easily afterwards.
Optional but useful: a spray bottle of water for dampening a single stubborn curl, a leave-in conditioner for after the trim, and a phone or timer so you can take breaks without losing track of which sections are done. Do not use thinning shears, razors, or a razor comb for this trim. They are shaping tools for trained hands, and on curly hair they create frizz and uneven texture that you cannot undo.
When to Trim Curly Hair: Timing and Frequency
Timing matters as much as technique. Plan your trim for two to three days after washing, not on wash day. By then your curls have settled into their natural pattern, any extra product stiffness has softened, and you can see clearly which curls clump together and which ones fray apart. Trimming on freshly washed hair is tempting because it feels clean, but wet or just-washed curls are not sitting the way they will sit for the next few weeks, so you are cutting a shape you will not actually wear.
Stylist Jamila Powell, owner and founder of Maggie Rose Salon, gives the same advice in her step-by-step guide: start with dry hair, because it is much easier to identify your curl pattern and spot split ends, and for tighter textures you have to take shrinkage into account — dry cutting is more accurate: ipsy’s guide to trimming natural hair at home.
How often you trim depends on your curl type, how fast your hair grows, and how much damage your ends collect. The table below is a starting point, not a rule — if your ends look stringy, your shape loses definition, or your curls stop clumping properly, it is time, whatever the calendar says.
| Curl type | Typical shrinkage | How often to trim | What to watch for |
|---|---|---|---|
| 2A–2B (loose waves) | Low, roughly 10–20% | Every 10–12 weeks | Ends going limp and stringy, waves losing their S-shape |
| 2C–3A (defined waves, springy curls) | Moderate, roughly 20–30% | Every 8–10 weeks | Frizz at the ends, curls falling flat instead of springing |
| 3B–3C (bouncy ringlets) | High, roughly 30–40% | Every 8–12 weeks | Ringlets unravelling at the tips, shape going triangular |
| 4A–4C (tight coils) | Very high, roughly 40–50% or more | Every 10–12 weeks | Ends knotting easily, coils losing definition, single-strand knots |
Heat styling, colour, bleach, and hard water all shorten the interval, because they damage the ends faster. If you straighten your hair regularly or you have recently lightened it, check your ends every six weeks even if you are not ready for a full trim. And remember the honest limit of the numbers in the table: shrinkage varies from head to head and even from curl to curl on the same head. Use the table to plan, then trust what you see in the mirror on the day.
How to Trim Curly Hair at Home, Step by Step

Set aside 45 to 90 minutes, and do not rush. A careful trim is slow work, and most of the time goes to checking, not cutting. Work in a room with good light, your hair completely dry, and styled the way you normally wear it. Here is the method, in order.
Step 1: Detangle gently. Starting from the ends and working up, detangle your dry curls with your fingers or a wide-tooth comb. Do not brush dry curly hair — a brush breaks the curl pattern and creates a cloud of frizz that hides the ends you need to see. If a section is badly tangled, dampen it very lightly with the spray bottle, detangle, and let it dry again before cutting.
Step 2: Section your hair into four parts. Part ear to ear, and down the middle from front to back, giving you four sections: front left, front right, back left, back right. Clip three sections up and start with the one at the front, because the front is the easiest to see and it sets your guide length. For very thick hair, split each quarter into two, making eight sections — smaller sections are easier to control and harder to get wrong.
Step 3: Cut one test curl first. Pick a single curl near the crown, let it fall exactly where it naturally sits, and snip just the tip — a quarter of an inch at most. Let it go and watch how it springs up. That one curl tells you how much length a snip actually costs on your hair, and it sets the baseline for everything that follows. If the test curl springs up more than you expected, take less from every other curl.
Step 4: Work the perimeter, curl by curl. Unclip one section at a time. Take one curl clump, let it fall naturally, and snip the very tip where the curl turns thin or frayed — usually a quarter to half an inch. Move to the next curl. Check the test curl’s length against each new curl as you go, so the perimeter stays even. Work from the front around to the back, using the hand mirror to check the back sections. Take your time: this is the step where the trim actually happens, and it should feel slow.
Step 5: Check the shape before you touch the interior. Once the perimeter is done, shake your curls out and look at the shape from the front, the sides, and the back. If the shape looks balanced, you may be finished — many maintenance trims need nothing more. Only if a section looks heavy or shelf-like should you point-cut into the interior: angle the shear tips into the ends of a curl clump to remove a little bulk without creating a flat edge. Never cut a straight line across the interior of curly hair.
Step 6: Fix strays, then stop. After styling, wait 24 to 48 hours before correcting anything. Curls relax and settle after the first day, so a curl that looked uneven on trim day may be fine by the second. When you do correct, trim only individual stray clumps, a tiny snip at a time. The most common way a good trim becomes a bad one is the extra round of “just a little more” — each round takes length you cannot put back.
Step 7: Wash, condition, and style as usual. Wash and deep-condition after the trim to remove the cut hairs and restore moisture. Our guide to how to deep condition hair at home covers timing, how long to leave a mask on, and which products to use. Style as you normally would and check the result in daylight. A good trim should look like the same haircut, only healthier — if the shape has changed dramatically, you cut too much, and the lesson for next time is smaller snips.
The Curl-by-Curl Technique in Detail
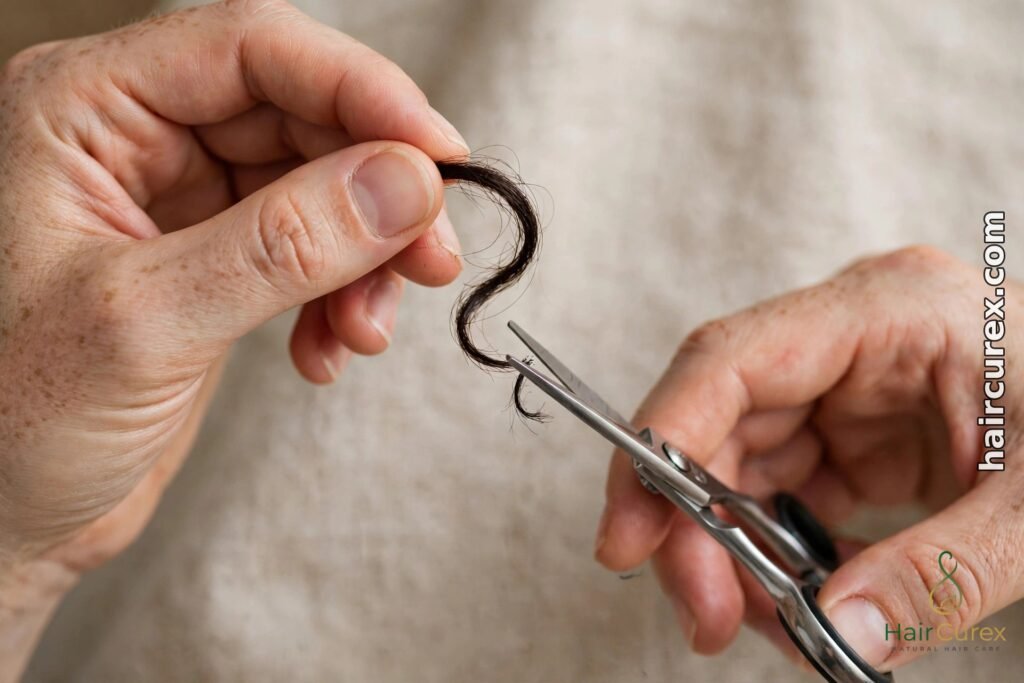
Curl-by-curl cutting — the method behind the Deva cut — is the heart of trimming curly hair at home, and it is worth understanding properly rather than rushing through. Hold each curl clump at its natural tension, never stretched straight, and cut just past the point where you want the finished length to land. Hold the shear blades parallel to the curl’s spiral, matching its natural direction, and snip from the outer edge of the spiral, just above where the curl turns thin or frayed. That angle follows the curl’s shape instead of cutting across it, so the curl keeps its pattern and springs back into place.
There are two variations worth knowing. The first is the twist method, which works well for tighter curls and coils: twist a small section gently, let the damaged ends poke out from the twist, and snip only the hairs sticking out. It is slow and fiddly, but it is very forgiving, because you only ever cut the ends that are visibly damaged.
The second is the pigtail or braid method, which gives you a built-in guide for even length: gather the hair into two low pigtails or loose braids, slide an elastic down to the ends, and trim below it. This method is better for looser waves than for tight curls, because braiding stretches the pattern and can hide how much length will spring back. Whichever method you choose, the rule is the same: small snips, check after every few curls, and stop while you still think you could take a little more. A detailed walkthrough of the same method, with timing and sectioning advice, is in HairAide’s guide: how to trim your own curly hair ends at home.
One more detail that beginners miss: cut with the curl, not against it. If a curl spirals clockwise, your shears should follow that direction. Cutting across the spiral flattens the curl and leaves a blunt, frayed edge that frizzes as soon as it dries. And always cut less than you think you need. You can always take another quarter inch off tomorrow; you cannot put it back today.
Mistakes That Ruin a Curly Trim
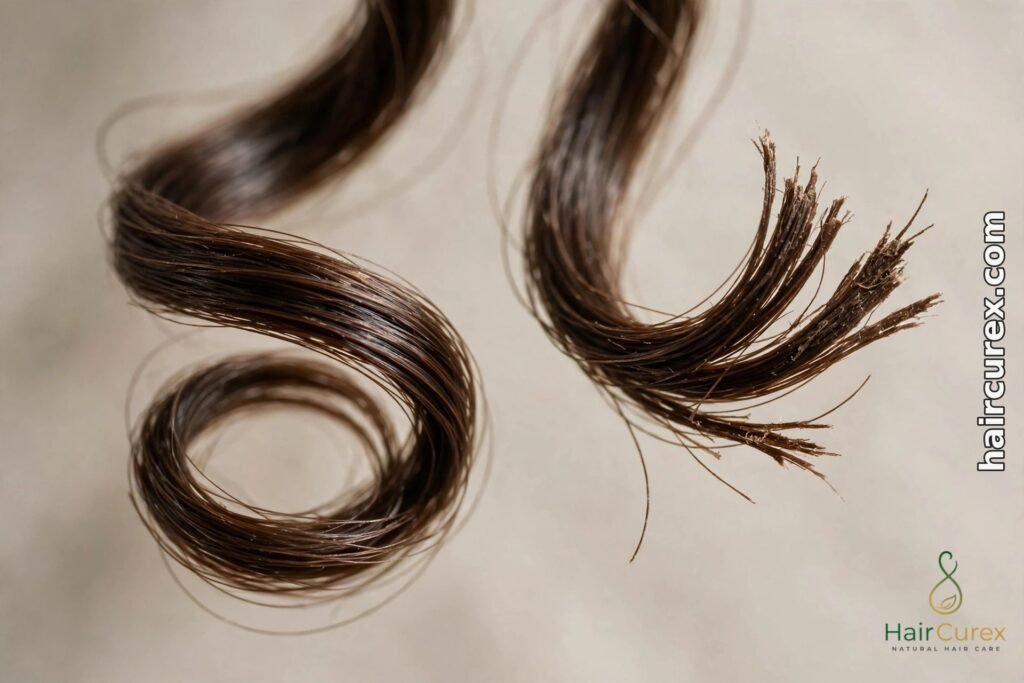
Most bad home trims come from a short list of avoidable mistakes. Knowing them in advance is worth more than any technique, because a mistake made in the first five minutes is the one you live with for weeks.
Cutting wet hair. This is the biggest one. Wet curls hang long and look even; dry curls spring up and sit unevenly. A trim that looks right on wet hair is almost always too short once it dries. Cut dry, always, except for very loose 2A waves where shrinkage is minimal and a light wet trim can be acceptable.
Stretching curls straight to cut them. Pulling a curl straight to get a “clean” cut is the classic mistake. The moment you let go, the curl springs back up, and a small snip becomes a much bigger loss of length. Cut each curl exactly where it sits, with no tension at all.
Using dull or household scissors. Kitchen scissors and craft scissors crush the hair shaft instead of slicing it, leaving a rough, frayed edge that splits within days. If your ends look worse a week after trimming than they did before, the scissors were probably the cause. Use proper hair shears, and only for hair.
Cutting straight across. A blunt straight line across curly hair creates a shelf or a triangle — heavy at the bottom, flat on top — because the curls at the bottom spring up less than the curls at the top. Always cut curl by curl, or point-cut into the ends, so the edge follows your curl pattern.
Cutting too much at once. The temptation is to “get it over with” and take an inch. On curly hair, an inch on a stretched curl can be two inches once it springs up. Take a quarter to half an inch, check the result, and only then decide whether more is needed. You can repeat a trim; you cannot undo one.
Trimming when your hair is dirty or product-heavy. Heavy product, gel cast, or a week of buildup changes how curls sit and clump, so you end up cutting a shape that only exists under product. Trim on day two or three after a wash, with your normal amount of product, not a heavy styling day. If your ends are already damaged, a trim helps — but so does the aftercare. Our guide to common curly hair problems covers frizz, breakage, and dryness, and how to tell which problem your ends actually have.
After the Trim: Wash, Style and Check

The trim is only half the job. What you do in the days after it decides whether the ends stay healthy or split again quickly. Wash and deep-condition within a day or two of trimming, using a moisturizing mask on the lengths and ends — freshly cut ends are open and absorb moisture well, so this is the best moment to give them a deep drink. Follow with a leave-in conditioner on damp hair to seal the ends and protect them from friction. Our guide to the best leave-in conditioners includes options for curly hair that add moisture without weighing the curl pattern down.
Check the result properly: in daylight, from the front, both sides, and the back, with your hair styled the way you normally wear it. Look for balance rather than perfection — the two sides do not need to match to the millimetre, because curls are not symmetrical, but the overall shape should look even and the ends should look clean rather than wispy. If a few curls stick out, snip them individually. If a whole section looks wrong, wait a week before deciding: curls settle, and a section that looked uneven on day one often falls into place once the curls have had a wash cycle to recover.
Protect the ends going forward — sleep on a satin pillowcase or in a loose pineapple, avoid rough towel-drying, and keep heat styling to a minimum. The American Academy of Dermatology’s healthy hair guidance covers the same basics: gentle handling, washing to suit your hair type, and protecting hair from heat and harsh treatments: AAD healthy hair tips.
When to See a Professional
A home trim is a maintenance trim. It keeps a good haircut healthy between salon visits; it does not replace the haircut. Book a curl specialist — a stylist trained in dry cutting or the Deva cut, not just any salon — if any of the following apply.
Your shape is already uneven or triangular, and you want it reshaped rather than just tidied. You want layers, a new length, bangs, or any change to the shape itself. Your hair is severely damaged from bleach, colour, or heat, and the ends are snapping at the slightest touch. You have tried a home trim before and the result was uneven, or you are nervous enough that you will rush and cut too much. And if your hair is falling out in patches, shedding suddenly, or your scalp is red, itchy, or sore, that is a dermatologist’s question, not a haircut question — those symptoms point to something beyond product or trimming.
A professional curly cut costs more than a standard trim, and it is worth asking the salon whether the stylist cuts curly hair dry and curl by curl before you book. If they cut all hair wet and straight across, they are not the right stylist for your hair, however good they are with straight hair. Between professional cuts, a careful home trim every eight to twelve weeks keeps the ends healthy and the shape intact — and that is exactly what this guide is for.
The Curly Girl Method is a good companion read if you want to build a full routine around the trim, covering washing, conditioning, and styling in a way that works with your curl pattern rather than against it.
Frequently Asked Questions
Should you trim curly hair wet or dry?
Dry, for almost every curl type. Curls shrink as they dry — roughly 20 to 50 percent depending on curl type — so a trim that looks right on wet hair is usually too short once it dries. Trim two or three days after washing, when your curls have settled into their natural pattern and you can see the ends clearly. Very loose 2A waves are the exception, since their shrinkage is minimal.
How much should you cut off curly hair at home?
Only a quarter to half an inch at a time, from the very tip of each curl. Never stretch a curl straight to cut it, because it will spring up once released and you will lose far more length than you intended. If you are unsure, cut less — you can always take another quarter inch off tomorrow, but you cannot put length back.
How often should you trim curly hair?
Most curly hair needs a trim every 8 to 12 weeks, depending on curl type and damage. Looser waves can go 10 to 12 weeks; bouncy ringlets usually need attention every 8 to 10 weeks. Heat styling, colour, and bleach shorten the interval. The real signal is your ends: if they look stringy, fray at the tips, or stop clumping into defined curls, it is time.
Can I trim my curly hair with regular scissors?
No — regular household or kitchen scissors crush and tear the hair shaft instead of slicing it cleanly, which creates frizz and new split ends within days. Use proper hair-cutting shears, ideally 5.5 to 6.5 inches with a convex edge, kept sharp and used only on hair. A basic pair of hair shears is enough for a maintenance trim.
Why does my curly hair look triangular after a trim?
A triangular shape — flat on top, wide at the bottom — usually comes from cutting straight across, which leaves the bottom curls too heavy, or from cutting wet, which hides how much the top curls will spring up. Fix it by point-cutting into the interior to remove bulk, or by booking a curl specialist for a reshape. A maintenance trim should keep your existing shape, not change it.
Is it better to trim curly hair yourself or go to a salon?
A careful home trim is fine for maintenance — tidying the ends and removing split ends between salon visits. Go to a curl specialist for a reshape, new layers, bangs, or any change to the shape itself, and for severely damaged hair. If you are nervous, short on time, or have never trimmed your own hair, a professional cut is the safer first step.